How to Login to a D-Link Router
How to login to a D-Link router
Assuming you already have your D-Link router set up and connected to the internet, follow these steps to login:
1. Open your web browser (Chrome, Safari, Firefox, etc.) and type in the router’s IP address. The IP address is usually found on the router itself or in the documentation that came with it.
2. Once you’ve entered the IP address, you should be taken to the router’s login page. Enter the username and password for the router. The username and password are also usually found on the router or in the documentation.
3. Once you’ve entered the correct information, you should be logged in and able to change settings as needed.
How to change your D-Link router password
To change your D-Link router password:
1. Log into the router’s web-based interface.
2. Click on the “Administration” tab.
3. Enter the new password in the “Password” field.
4. Confirm the new password in the “Confirm Password” field.
5. Click the “Save” button to save your changes.
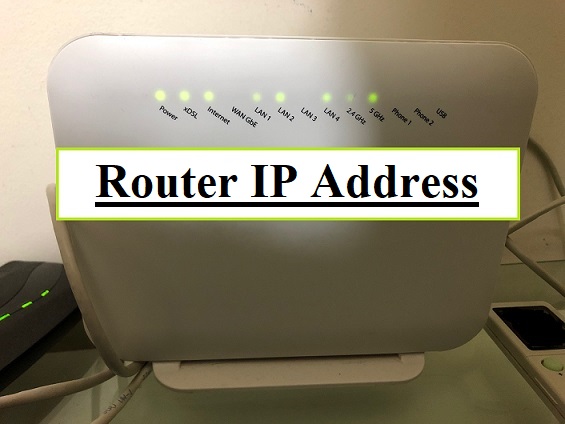
How to find your D-Link router’s IP address
Assuming you’re asking how to find the IP address of your D-Link router:
1. Check the router’s label. Many routers have the default IP address printed on a label on the bottom or back of the router.
2. If you can’t find the label, try logging into the router. The router’s IP address is usually the gateway, and it should be shown in the router’s settings.
3. If you still can’t find it, try connecting to the router using a web browser. The router’s IP address is usually 192.168.0.1, but it might be different.
How to update your D-Link router’s firmware
It’s important to keep your D-Link router’s firmware updated to enjoy the best possible performance and security. Here’s how to do it:
1. Download the latest firmware for your router from D-Link’s website.
2. Connect to your router’s web interface and go to the Administration tab.
3. Under the Firmware Upgrade section, click the Browse button and select the downloaded firmware file.
4. Click the Upgrade button to begin the firmware upgrade process.
5. Once the upgrade is complete, your router will reboot itself.
How to port forward on a D-Link router
Port forwarding is a way to forward incoming traffic on a certain port to another device on your local network. This is useful if you have a device that needs to be accessible from the internet, such as a web server.
To port forward on a D-Link router, you will need to login to the router’s web interface. The default address for this is usually 192.168.0.1. Once logged in, look for the “Port Forwarding” or “Virtual Server” section. Here, you will need to add a new entry with the following information:
– The name or description of the service
– The internal IP address of the device you are forwarding to
– The port or range of ports to forward
– The protocol (TCP, UDP, or both)
Once you have saved the new entry, traffic on the specified port will be forwarded to the specified device.
How to set up QoS on a D-Link router
If you want to improve your internet speeds or reduce lag when gaming or streaming, you can enable Quality of Service (QoS) on your D-Link router. QoS automatically schedules and prioritizes your network traffic, so high-priority traffic is always given priority over lower-priority traffic. Here’s how to enable QoS on your D-Link router:
1. Log in to your router’s web interface. The web interface is usually accessed by entering the router’s IP address into a web browser.
2. Navigate to the QoS settings page. This page is usually found under the “Advanced” or “Performance” settings.
3. Enable QoS. This will usually be a checkbox or radio button labeled “Enable QoS” or something similar.
4. Select the type of QoS you want to enable. There are typically two options: “Prioritize by Application” and “Prioritize by Device.”
5. If you selected “Prioritize by Application,” select the applications you want to prioritize. Most routers have a list of common applications, such as web browsers, email clients, and online games. If your application is not listed, you can usually add it by entering the application’s IP address or port number.
6. If you selected “Prioritize by Device,” select the devices you want to prioritize. Most routers will list the devices currently connected to your network.
7. Save your changes. Once you have enabled QoS and selected the applications or devices you want to prioritize, be sure to save your changes.
How to set up a guest network on a D-Link router
Assuming you would like a general overview of the steps to set up a guest network on a D-Link router:
1. The first step is to log into the router’s web-based interface.
2. Once logged in, click on the “Wireless” tab from the main menu.
3. Next, click on the “Guest Zone” tab.
4. Then, click the “Enable Guest Zone” radio button to enable the guest zone feature.
5. After that, enter a name for the guest zone in the “Guest Zone Name (SSID)” field.
6. Now, select the security mode for the guest zone from the “Security Mode” drop-down list.
7. Finally, click on the “Apply” button to save the changes.
How to enable remote management on a D-Link router
Assuming you would like remote management enabled on your D-Link router, there are a few steps to follow.
First, open your web browser and type in the IP address of your D-Link router. The default IP address is usually 192.168.0.1. Once you hit enter, you will be prompted for a username and password. The default username is admin and the default password is also admin.
Once you are logged in, click on the word “Advanced” at the top of the page. Next, click on “Network Address Server Settings” in the left-hand menu. In the “WAN NTP Server” field, type in the IP address of the server that you want to use for remote management.
The next step is to click on the “Firewall” tab at the top of the page. Then, click on “Virtual Servers” in the left-hand menu. In the “Name” field, type in a name for this rule. In the “Service Port” field, type in the port that you want to use for remote management. The default port is usually 22.
Next, click on the “Apply” button at the bottom of the page. Your D-Link router is now set up for remote management!
What is the default username and password for a D-Link router?
The default username and password for a D-Link router is admin.
If you can’t remember your password, you can reset your router to its factory default settings. To do this, press and hold the reset button on the back of the router for about 10 seconds. This will reset your password to the default, which is usually admin.

How to connect with wifi router
How to Secure Your Router with a Keyword